5 Tips for Better iPhone Photos
The iPhone camera is simple to use. Much simpler than one of those point-and-shoot cameras we used to carry around in the early 2000s. But even the simplest cameras can be very powerful, and that’s the case with the most popular camera in the world. After all, the best camera is the one you’ve got with you. In this blog post, I share my top five tips and tricks to get your iPhone photography to the next level (or, as kids call it these days, Instaworthy).

in·sta·wor·thy (adj.)
[in-stuh-wur-th ee]
When a photo is good enough to be posted on Instagram.
“Do you like this photo of me?”
“Yeah! Totally instaworthy.”
1. Control Your Controls
Your iPhone’s camera is great straight out of the box and has most of the controls you’ll need to take beautiful photos. However, there are a few other tools built into it that are not immediately available.
The first one is the grid. In photography, there is a concept called “the rule of thirds.” The rule states that by having a 3×3 grid on your viewfinder and placing key objects within the intersecting lines, you can create more balanced compositions. The iPhone’s grid is turned off by default, but you can turn it on by navigating to the Settings ![]() app and tapping on Camera. While you’re in the Camera’s settings, make sure to also check out all the available video quality options!
app and tapping on Camera. While you’re in the Camera’s settings, make sure to also check out all the available video quality options!
2. Manual Exposure
Have you ever been in a situation where the lighting isn’t ideal and your iPhone automatically brightens the wrong subject? The camera is trained to automatically adjust its exposure settings for the environment you’re in, but it doesn’t always get it right. That’s where manual focus and exposure come in. When you’re ready to take a photo, tap on the subject and slide your finger up or down to adjust how much light you want to let in. In very bright situations, you’ll want to slide it down; in dark situations, you’ll want to do the opposite.

3. Flat Lays
We all love those food Instagram accounts full of photos taken from above. Those are called flat lays, and while they may seem difficult to capture, one of the tools we already covered will definitely help you. When you enable the grid, point the camera straight down above your subject until two sets of white cross hairs appear. Adjust your iPhone until the cross hairs align and turn yellow.

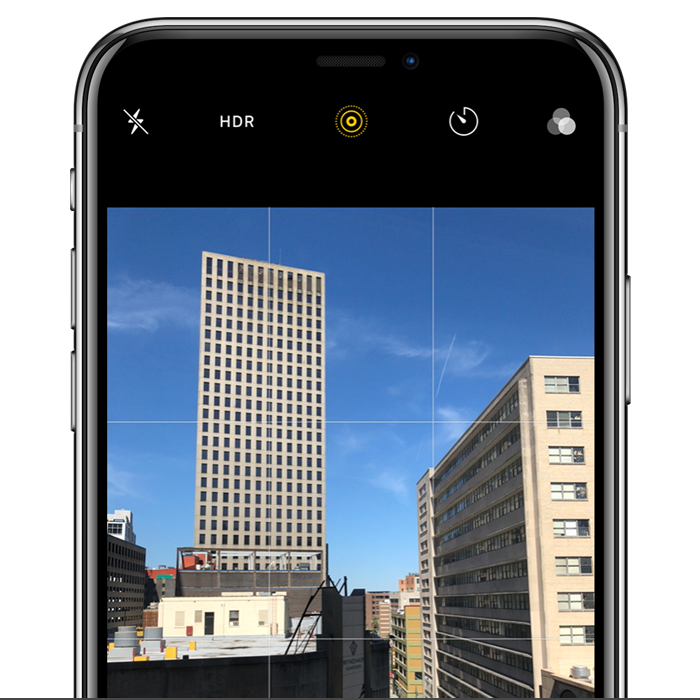
4. HDR
The iPhone has another built-in pro feature that you might have missed. HDR (High Dynamic Range) mode captures three exposures (light, regular, and dark) and blends them into a single image with a greater range of contrast and luminosity. While this feature is set to auto in some iPhones, you can set it to Manual in the Camera’s settings and pick when you want to use it. If set to manual, you’ll see a yellow HDR label at the top of the camera UI.

5. Vertical Panoramas
Shooting vertical panoramas is perfect for capturing tall structures. To shoot one on your iPhone, open your camera, scroll to Pano mode, and turn the device on its side. Tap the arrow on the screen to change where you want your pano to begin (either from the top or the bottom) and start shooting. The camera will automatically adjust the exposure as you pan the device so that the lighting is balanced.

Taking beautiful photos isn’t hard when you know how to get the most out of your camera and all of the tools you have available. There are also hundreds of free and paid apps in the App Store that extend the functionality of the iPhone’s camera and let you create that killer visual consistency that every business on Instagram needs. So don’t worry about having to spend a lot on a new DSLR and having to learn how to use it, because you’re most likely holding an amazing camera in your hand right now. You can even use your iPhone photography for ads, though we recommend using professional product photography for best results.
To learn more about our photography and social media services, contact Online Optimism today.